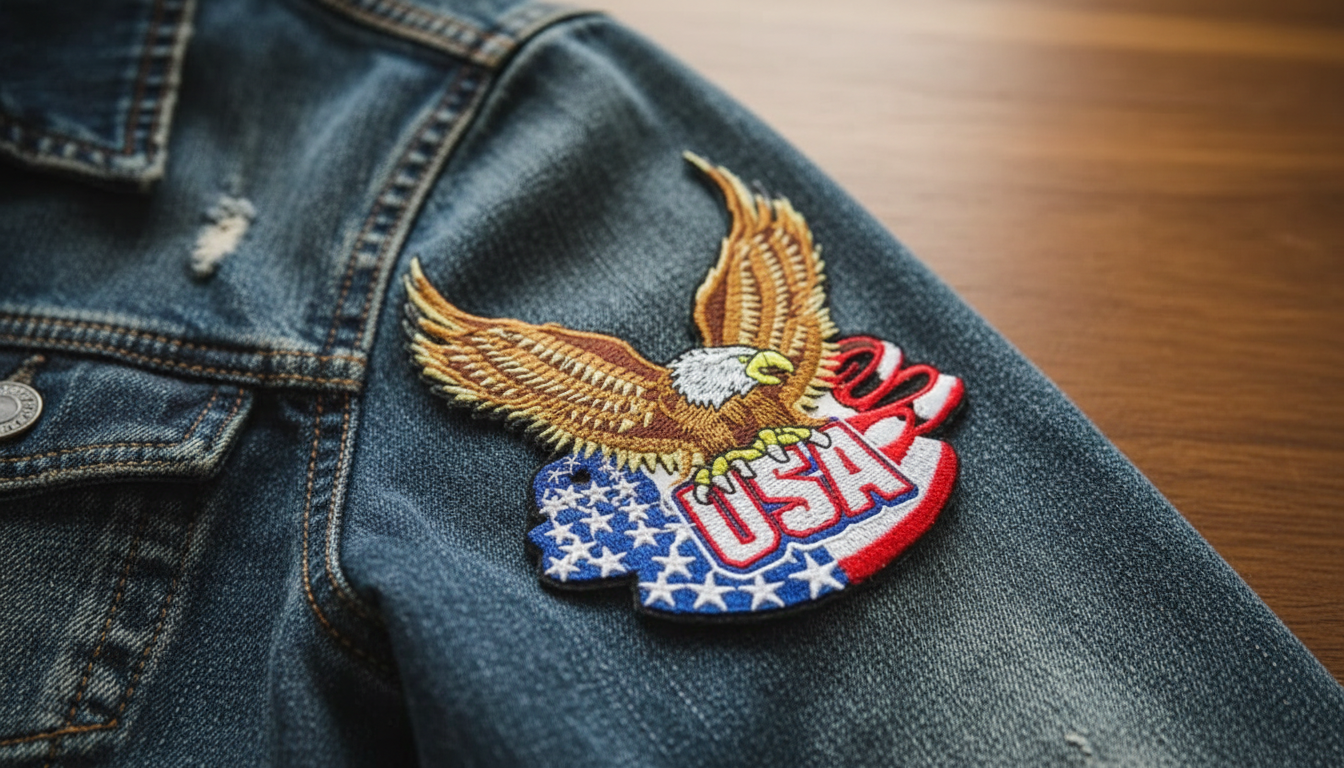
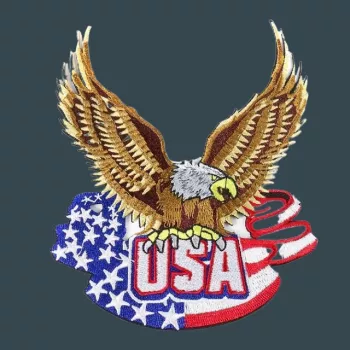
2PCS USA Eagle Flag Iron-On Patches – A bold, classic upgrade for everyday gear
Add a confident patriotic accent to jackets, backpacks, hats, and uniforms with a matching set of embroidered USA eagle-and-flag patches. Built for iron-on application (with the option to stitch for extra security), these appliques make it simple to personalize gear, cover small flaws, or refresh a favorite piece with a timeless American motif that stands out without looking flat or printed.
Quick look: what these patches do best
- Creates an instant patriotic focal point with an eagle-and-flag embroidered design
- Works for personalization, event outfits, club/group apparel, and DIY repairs
- Iron-on backing makes application fast; sewing can reinforce edges for long-term wear
- Two-piece set supports symmetrical placement (left/right) or multiple items
If you want a dependable, coordinated look on two sides of a jacket or on two different items (like a cap and a bag), a two-pack makes planning your layout much easier.
Design and materials at a glance
Embroidery gives these patches a textured, dimensional finish that reads as intentionally “built” rather than simply printed. The eagle-and-flag motif pairs naturally with rugged materials—think denim, canvas, twill, and outerwear fabrics—while still looking sharp on cleaner workwear pieces.
The iron-on adhesive layer is designed to bond with controlled heat and pressure. For best results, start with clean, dry fabric with minimal stretch, and take a minute to position the patch exactly where you want it before pressing.
Set details
| Feature |
What to expect |
| Quantity |
2 patches |
| Style |
Eagle + USA flag motif |
| Construction |
Embroidered applique with iron-on backing |
| Typical placement |
Jackets, backpacks, hats, uniforms, jeans, vests |
Where they look great (and where to avoid)
These patches look especially at home on sturdy, high-utility items. The embroidery stands up visually against textured fabrics and creates a clear focal point without needing extra accessories.
- Great on: denim jackets, canvas bags, tactical-style packs, work shirts, scout-style sashes, and costume pieces
- Useful for: covering small stains, pinholes, or worn spots while adding intentional design
- Avoid or use caution on: very stretchy knits, delicate silks, waterproof-coated fabrics, and heat-sensitive synthetics
- If the fabric melts or shines easily when ironed, choose a lower-heat approach and reinforce by sewing
For flag-inspired designs, thoughtful placement also matters. If you care about keeping the patch looking crisp, avoid spots that get constant abrasion (like the inside of backpack straps) or frequent heavy soiling. For reference, you can review the U.S. Flag Code for general guidance on respectful display.
How to apply with an iron (clean finish, strong bond)
A good bond comes from the right combination of heat, pressure, and patience—especially the cooling step, which helps the adhesive set.
- Preheat the iron and turn off steam; steam can reduce adhesion
- Test heat on an inconspicuous area of the garment to avoid scorching or shine
- Place the patch adhesive-side down; cover with a thin cotton cloth or pressing sheet
- Press firmly without sliding the iron, applying steady pressure for the recommended time
- Let it cool completely before moving the garment; cooling helps the adhesive set
- For high-movement areas (elbows, knees) or frequent washing, add a few stitches around the border
Practical pressing guide (general starting points)
| Fabric type |
Heat approach |
Pressing tip |
| Denim / heavy cotton |
Medium-high heat |
Use firm pressure; press in place |
| Canvas / twill |
Medium heat |
Press longer rather than hotter if needed |
| Poly blends |
Medium or lower heat |
Use a pressing cloth; consider stitching |
| Nylon / coated fabrics |
Avoid high heat |
Sew on instead of ironing when in doubt |
If you’re ever unsure about how a fabric responds to heat, a cautious approach is best. General apparel safety and textile guidance can also be found through the Consumer Product Safety Commission’s clothing and textiles resources.
Care and durability tips
- Wait before washing after application so the bond can fully set (longer is better)
- Wash inside-out on a gentle cycle to reduce edge lifting and abrasion
- Avoid high-heat drying if possible; air-dry or low heat helps preserve adhesive and embroidery
- If an edge begins to lift, re-press with a cloth and firm pressure, then stitch the perimeter
- For heavy-duty use (workwear, bags, uniforms), stitching provides the most reliable long-term hold
A quick perimeter stitch is a small step that can dramatically improve longevity—especially on backpacks or frequently washed jackets.
Outfit ideas and occasions
Featured in-stock picks (easy ways to build a full look)
Respectful use and display notes
FAQ
Do iron-on patches stay on after washing?
They can, but longevity depends on fabric type, how well the patch was pressed (heat and pressure), and your wash routine. For best results, wash inside-out on gentle cycles and consider stitching the border for long-term durability.
Can these patches be sewn on instead of ironed?
Yes. Sewing is a great choice for heat-sensitive fabrics and high-wear items like backpacks or uniforms; a simple perimeter stitch (or a zigzag/blanket stitch) helps keep edges from lifting over time.
What’s the safest way to iron a patch onto polyester or blends?
Use a pressing cloth, lower heat, and firm pressure for a longer press time, and test a hidden area first to prevent shine or melting. For extra security on blends, add a few stitches around the edge after cooling.
Recommended for you








Leave a comment